KIMMCO DUCT INSULATION (KDI)
Description
Applications
Facing & Covering
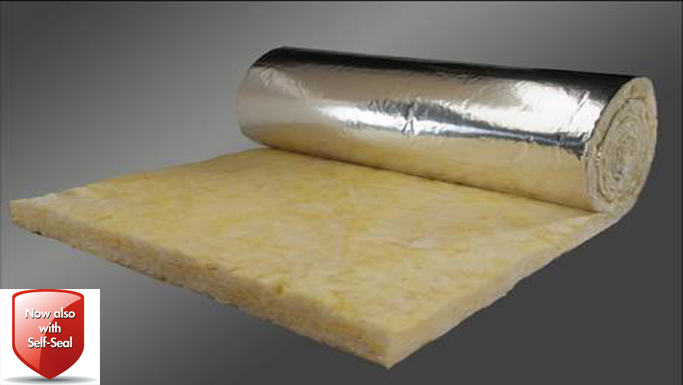
Semi-rigid and rigid slabs manufactured from stable glass fibres bonded with thermo-setting resins, and free from coarse fibres and shot. Easy to handle and cut to fit rectangular ducts and air handling equipment.
External insulation of rectangular and circular air ducting and air handling equipment.
KIMMCO Duct Insul (KDI) is in the form of flexible rolls.
KIMMCO Duct Insul is available un-faced or with a glass reinforced aluminium foil/Kraft laminate facing (FSK) which combines a pleasing appearance with excellent vapour resistance.
| Availability | Thickness (mm) | Width (m) | Length (m) | ||||||
|---|---|---|---|---|---|---|---|---|---|
| Rolls | 25. | 40. | 50. | 75. | 100 |
0.4 |
0.6, 0.1, | 1.2 |
10 to4.5 |
| Slabs | 25. | ||||||||
| 40. | |||||||||
| 50. | |||||||||
| 75. | |||||||||
| 100 | |||||||||
|
1.2 |
1.0 to 2.4 |
||||||||
Performances
- WORKING TEMPERATURE: Fibre 230 °C; Foil Face 100 °C.
- PERMANENCE: KIMMCO Duct Insul has a high resistance to accident damage from knocks and handling during installation and maintenance. Dimensionally stable under varying conditions of temperature and humidity, rot proof, odourless, non-hygroscopic and will not sustain vermin or fungus.
- COMBUSTIBILITY: Base fibers are non combustible when tested in accordance with BS 476 (part 4), ASTM El 36.
Read more: KDI Catalogue
Also see the Material Safety Data Sheet MSDS
Installation 1
- Ensure surface of duct is dry and free from dust or grease. Cut insulation to required length to tit around the duct, making sure that edges are straight.
- Apply insulation adhesive to duct surface in strips approx. 15 cm wide. Underside of duct should be completely coated with adhesive to prevent sagging.
- Wrap insulation, foil face up, to the prepared duct surface once adhesive has become tacky, or as instructed by manufacturer, making sure that all edge joints are closely butted.
- Apply uniform hand pressure to outside surface of insulation to obtain good bond.
- Tape all longitudinal and transverse joints with a good quality self adhesive insulation tape. Seal any puncture points in insulation around hangers etc. with tape.
- If lacing wire is used for additional security a light gauge galvanized angle should be fitted on each edge to prevent wire from cutting into insulation.
Installation 2
- Ensure surface of duct is dry and free from dust and grease. Cut insulation to required length to fit around the duct making sure that edges are straight.
- Depending on size of duct, fit 2 or more rows of insulation fixing pins to each face of duct at centers of 30 – 50 cm. Pins can be self adhesive type, bond-on type or stud welded.
- Carefully position insulation over the pins, pressing firmly so that pins penetrate through the insulation. Fit spring clip or lock washer over pins pushing them down until tight against insulation. Snip of any excess shank from pin. Seal all joints and openings with self adhesive tape.
Installation 3
- Where KIMMCO Duct Insul (KDI) requires protection against mechanical damage or is to be used outdoors, the insulation can be wrapped with wire mesh to which an application of quick setting compound or cement can be applied.
Installation 4
- Circular ducts can be easily insulated with KIMMCO Duct Insul (KDI). Cut KIMMCO Duct Insul to suit the circumference of the duct. Clean surface of duct to remove dust and grease. Apply insulation adhesive in strips approx. 15 cm wide. Wrap insulation onto duct applying firm hand pressure to obtain maximum bond.
- When applying each wrap of insulation ensure that longitudinal joints are kept in line. Seal all joints with self-adhesive tape. Large ducts can be reinforced with self adhesive tape, metal or nylon strapping.